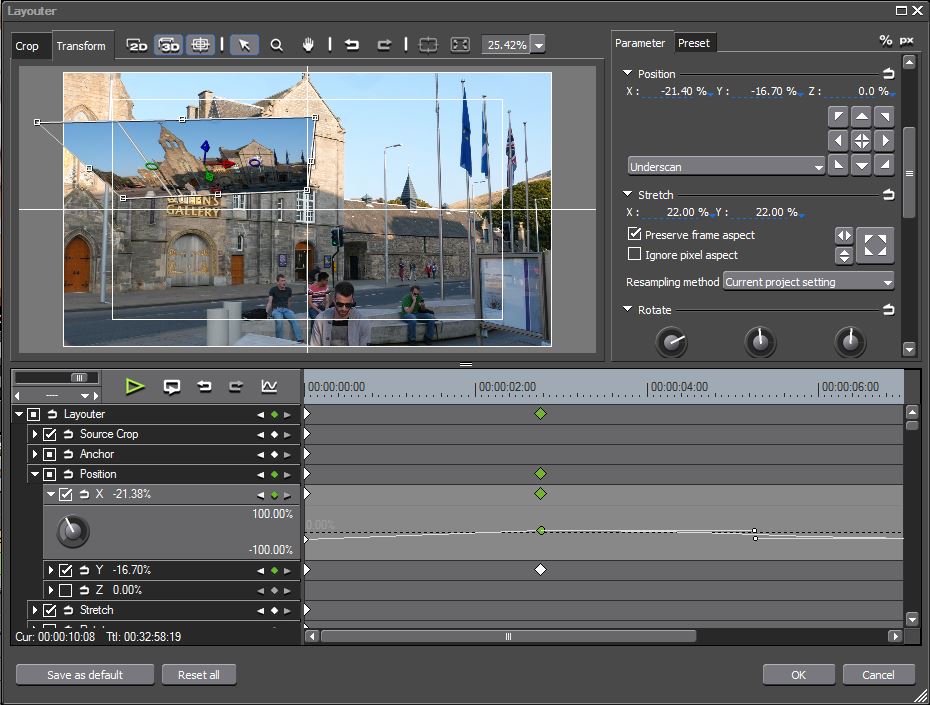
 The LAYOUTER is the best way to resize and move images inside of EDIUS. With this you can crop an image, move it in 2D and 3D and keyframe the movement so it goes exactly where you like. The LAYOUTER is the best way to resize and move images inside of EDIUS. With this you can crop an image, move it in 2D and 3D and keyframe the movement so it goes exactly where you like.
The main advantages of the LAYOUTER are:
- LAYOUTER maintains the quality of the image, rather than scale it to video size, then move it.
- LAYOUTER is a filter rather than a keyer so you can move it around amongst the other filters. This is very important when using effects like the MASK filter where you cut a whole in a clip using a mask you draw. If the PNP filter is in the wrong place you appear to be moving a clip around behind a hole, rather than moving the contents of the hole around (it makes sense when you do it).
- The LAYOUTER’ keyframes do not change when you resize the clip. If you put a keyframe at 10 seconds and resize the clip the keyframe stays put – so resize the clip to 5 seconds and you do not reach the end of your motion path. With the 3D PNP you define a path an not matter what the length of the clip it still flies along the same path – just faster or slower.
|
 The mask tool The mask tool
The mask tool is the next generation of the old “region filter”. This lets you apply an effect inside or outside of an area and keyframe it so it moves across the screen. This can be any of EDIUS range of filters or you could just make the area outside the mask transparent. In the clip here we have cut out the shape of Ringo, to superimpose him on another image. Notice that you can soften or “feather” the edges of the mask either inside, outside or both. You can also have multiple shapes in the same filter. If you have 3 people’s faces you need to blur then put a mask on each one and they will all be blurred, all in the one filter.
Masks can be rectangular, spherical or a hand drawn shape complete with bezier curves. The only way to get better masking than this is to use a full-blown compositing program like Adobe After Effects. |
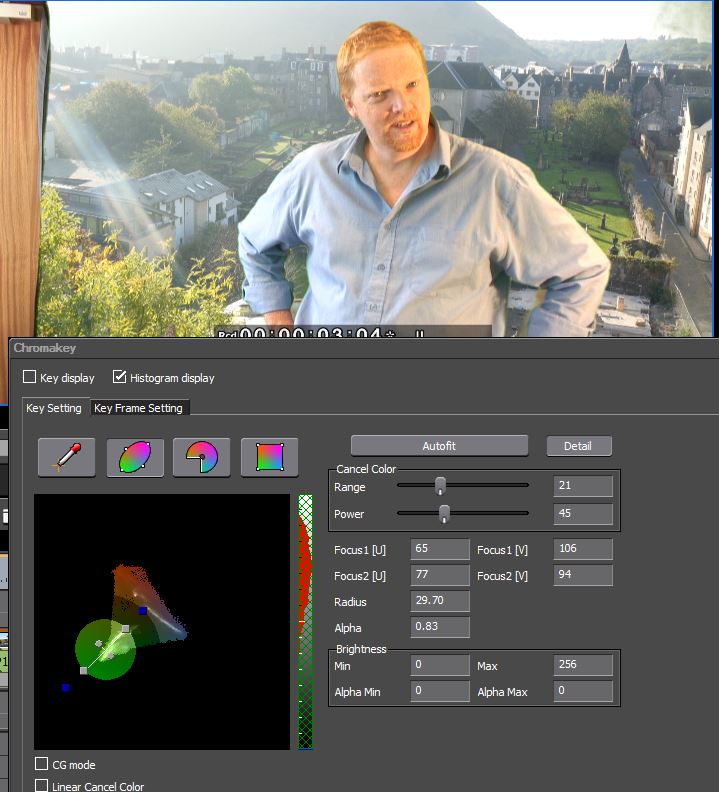 Chromakey Chromakey
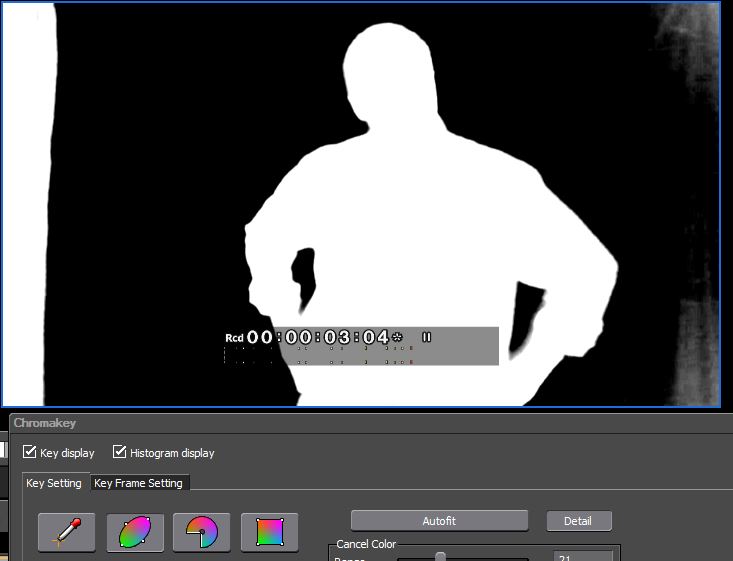
The EDIUS’ Chromakey is amazingly good. The quality of the key is astounding and you can tweak the results very easily. Here you can see some of the more sophisticated controls. The results can be key framed, applied to a rectangular region and best of all the adjustments you make are seen instantly on the TV attached to the computer so you know what the results are going to be without waiting. Like any professional keying program you can view the key in various ways. Below you can see the “key display” showing you how clean your image is – the white parts are opaque and the black parts transparent.
If you want better keying in EDIUS then you need to get a plug-in. Robuskey is the best keying plug-in we have which works in realtime with the right graphic card.
Key out the light or dark areas of an image. Lumakey is easier to get right than Chromakey, but you always have to be careful about how you light your subject. |
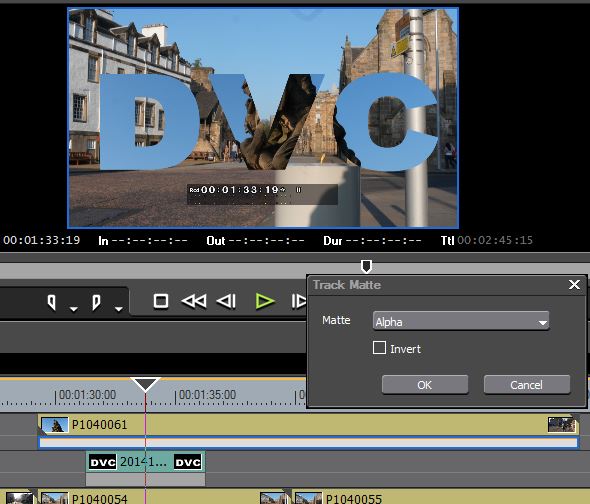 Track Matte Track Matte
A track matte filter which lets you lay out 3 video tracks, and make a hole in clip using the video placed on another track.
In this example we have two pieces of video with a title and the words DVC in between. Add the track matte and the title cuts a whole in the video. However as this on the video track we can now add some motion the title and the hole in the video will move around. You can use any video so you can disappear off to After Effects, for example, to make a really complex mask using their new “rotobrush” tool, export that as a black and white image, and load that into EDIUS as a matte for your video. |
