
Using Handbrake
Handbrake is a useful free application that can make MP4 files. It uses the very high quality X.264 & X.265 encoder, and can process multiple files at once. Some people use it to take a DVD and convert all the contents into a series of video clips, complete with subtitles and different audio tracks.
Most videographers would use it to either make MP4 files from their final movies or convert a file that will not play in their editing program into something useful.
There are loads of possible settings. Below at the kind of settings I would use if converting a file for re-use in another program.
MP4 or MKV?
MKV is a type of file that lets you have multiple audio tracks and multiple subtitles. However, most editing programs will not load them. MP4 is the more standard format if you are making a file to give to someone else or re-use. If you tell Handbrake to make an MP4 and then select multiple audio or subtitle tracks it will ignore them.
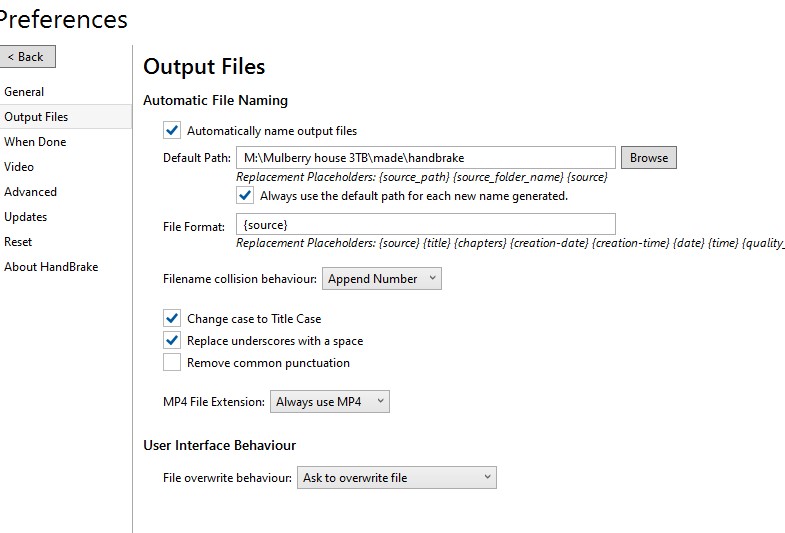
Also go into the preferences and make sure it the mp4 extension is always set to MP4 and not MV4.
Track selection
You can choose some default for which tracks you want in the original clip – assuming it has multiple audio tracks and subtitles. if just converting a file to be used in an editing program, or using it to make a final file, this will not matter. Suppose you are loading a DVD with a surround sound and two stereo versions – one in English, one in german. You can choose just select the English tracks, or just the Surround sound etc. If just using it to make one type of MP4 file then ignore the track selection.
Basic settings
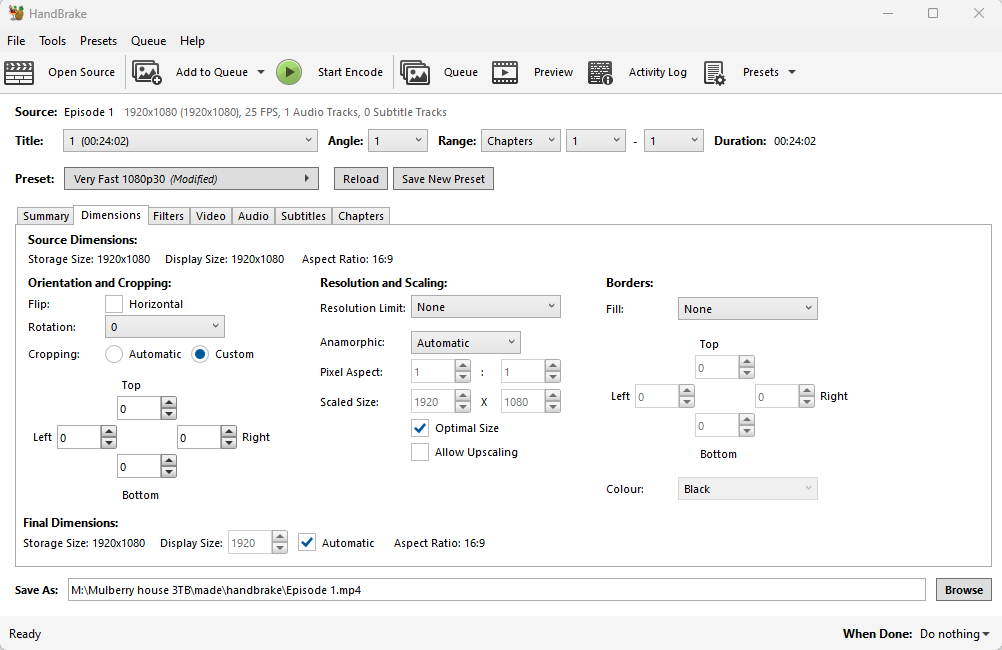
On the dimensions tab got to cropping and put it on “custom”. Change everything to 0. If feeding Handbrake with a DVD that has a movie with black bars on the top and bottom Handbrake tries to automatically chop off the black bars. Sometimes it get is wrong on clips that do not have black cars and chops off bits you want to keep, so I tell it to keep everything.
Video settings
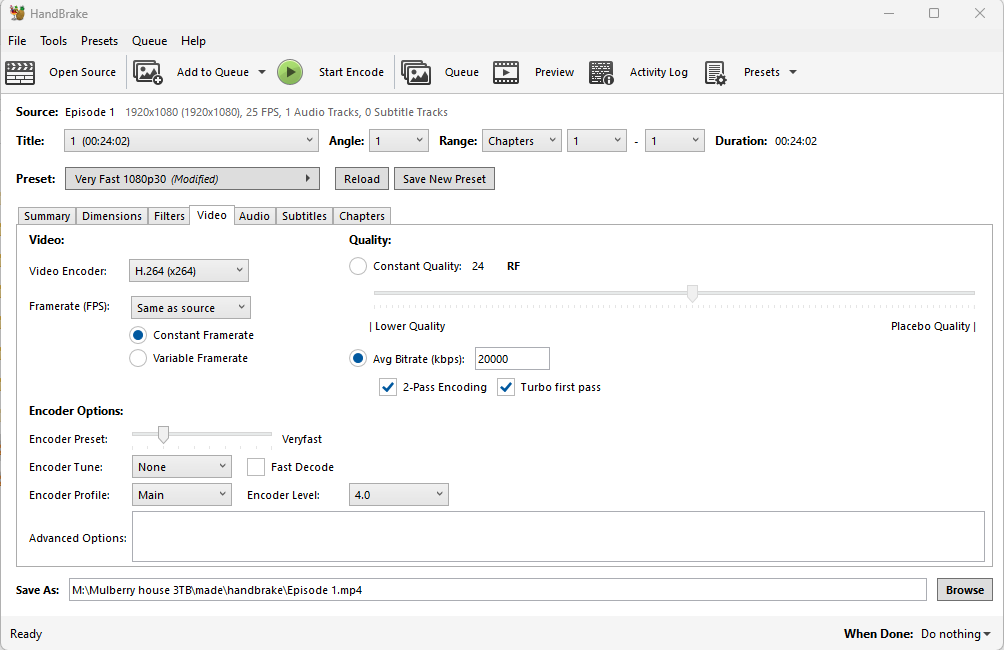
On the video tab, set frame rate “same as source”, constant frame rate, and take it off constant quality and choose an average bit rate.
The big question is what is the correct average bit rate. Too low and the clips will start to look naff. Too high and they will be bigger than they need to be.
It really depends on what you are trying to achieve. If you want to remake an HD to something your editing program would like, I would set around 20,000. If you want to make a small HD file that looks good you may be able to get away with 9,000 or something in between. Some of this will just be try it and see what it looks like. For low bit rates look at fast moving scenes and ones with lots of green which are the ones which look worse at lower bit rates.
Audio settings
Here you can choose to make lots of different tracks. By this I don’t mean stereo (2 tracks) or mono (1 track). I mean two totally different audio mixes – ie. one in English and one in German etc.
If making an MP4 you cannot include multiple tracks so most videographers using this would not bother.
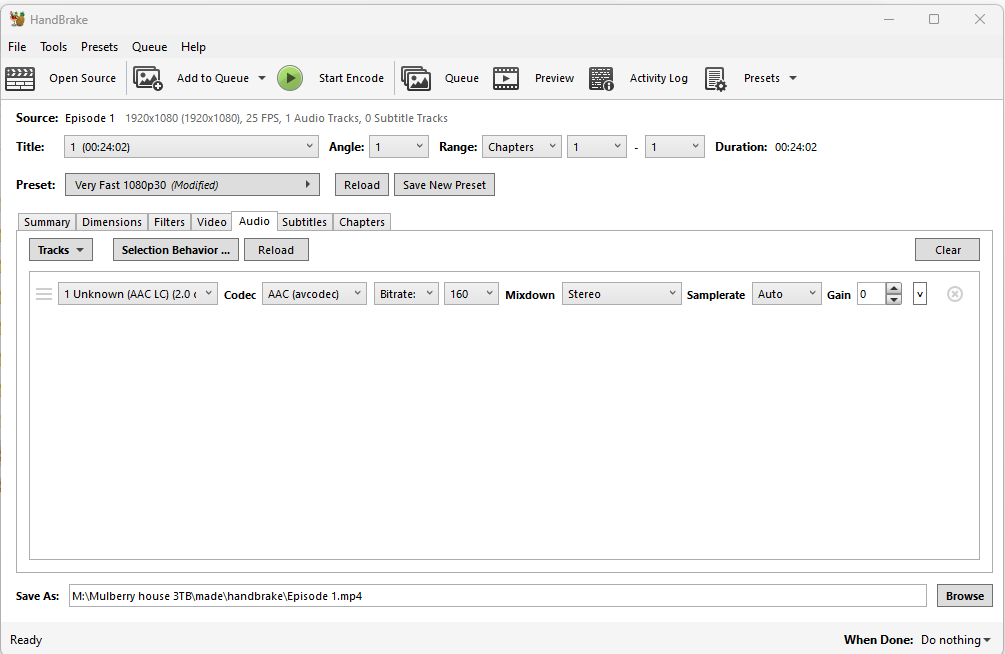
For a single audio track make sure the settings on the audio tab to stereo (or whatever you want). The default preset is set to mono. You might want to change the bitrate, which is 160 as default, to something higher too. 160 is ok. Setting it lower may lower the quality. Setting it higher will use more space but may sound better. I tend to use 256 unless trying to make a small file for stereo clips and 448 for surround sound.
You can change the codec etc but I would leave these as they are.
Once you have settings you like save a preset. Then go up to the preset heading and save this preset as default.
I have made a video about using Handbrake which you can see here: